Looking to set up an Outbrain campaign with Xandr? Easy! Just follow the steps below and you’ll be on your way 🙂
NOTE that Xandr only supports targeting of Outbrain inventory in the United States, United Kingdom, France, Germany, Spain, and Italy. Buyers outside of these geos are welcome to target Outbrain inventory via Xandr within the listed markets above.
In this guide we will cover the following:
Xandr Console & Hierarchy
- The Xandr Console hierarchy is as follows: Advertisers > IO > Line Item. Within each layer, you set rules/targeting parameters that can affect the lower layers.
- Before uploading creatives and setting up your deal, be sure the applicable advertiser and line item(s) have been created
Uploading Native Creatives
Please follow the steps listed below:
- For creative set-up, go to Creative Manager > Select Advertiser > Create New > Select Format Native Single (one creative) or Native Bulk (multiple creatives). If creative is third-party served, click the “Third-Party URL” tab and enter the URL. Follow steps as listed above.
- Upload creative and preview
- Assign any third-party tracking – JS/Impression/Click tracking is supported
- Choose carefully when selecting the “Competitive Exclusions” classification. These are used to prevent creatives with competitive brands or categories from serving alongside each other and can therefore interfere with performance.
- Select creative audit/QA option.
- Click save.

Native Creative Specifications
Important creative specifications to note are:
- Description (Body Text) is only partially supported
Description is partially supported across the Outbrain network. This means that your inputted Description/Body Text will not be shown across all Outbrain placements, only the select publisher placements which support it. For this reason, you should make sure your headline (title) can stand alone.
- One headline is required for each ad
Your headline should be engaging and able to stand alone. For this reason, Outbrain recommends using a longer headline (Title) with descriptive copy.
- Sponsored By (brand name) is required for each ad
Your Sponsored By name should be a maximum of 25 characters (within your DSP’s limits).
- Outbrain supports images sized 1200x800px. Never use images with text within them
To create the best possible ad experience, Outbrain does not approve images that contain text within them. Ensure any necessary text is in your headline.

Accepting Your Deal
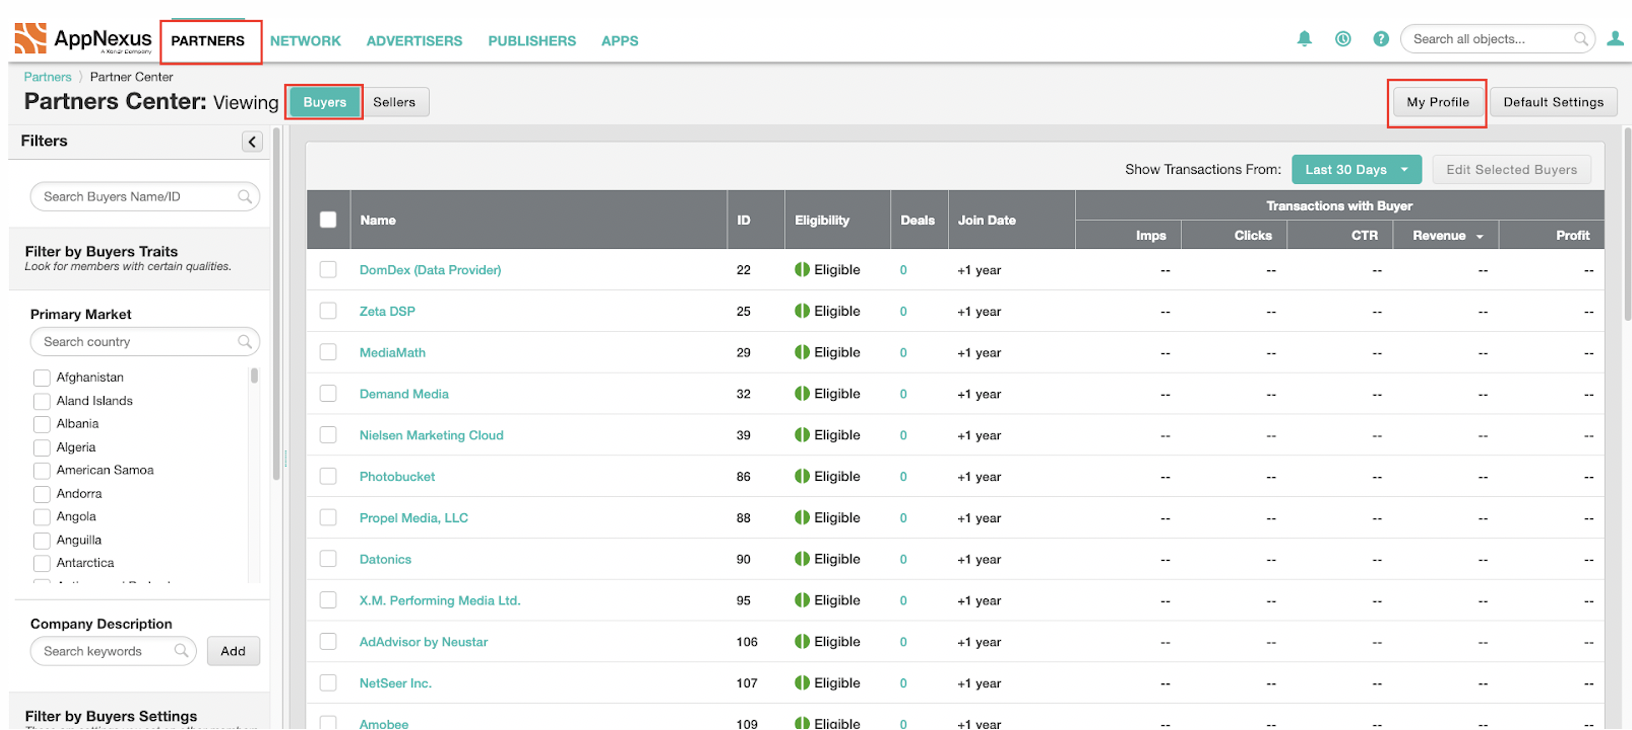
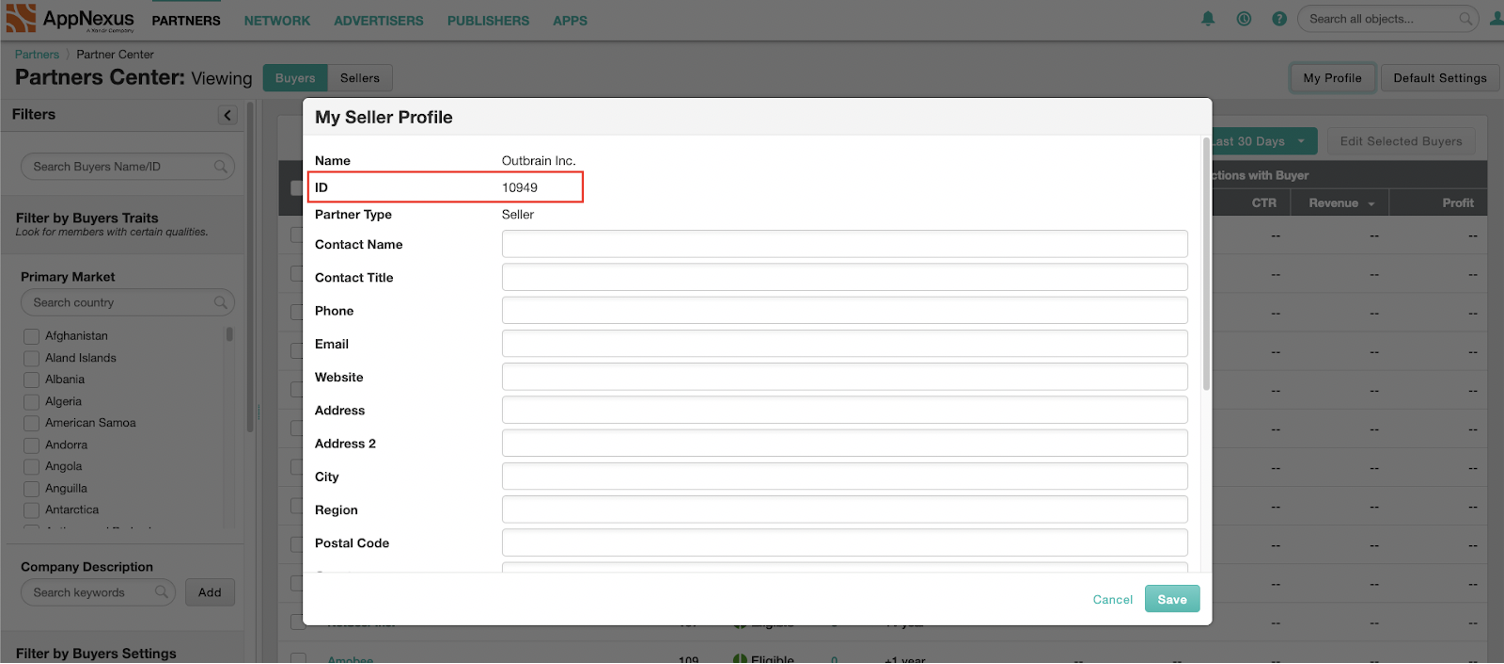
- Head to Partner > Partners Center, click on Buyers and then select My Profile.

- Use the ID provided in the My Profile Setting.

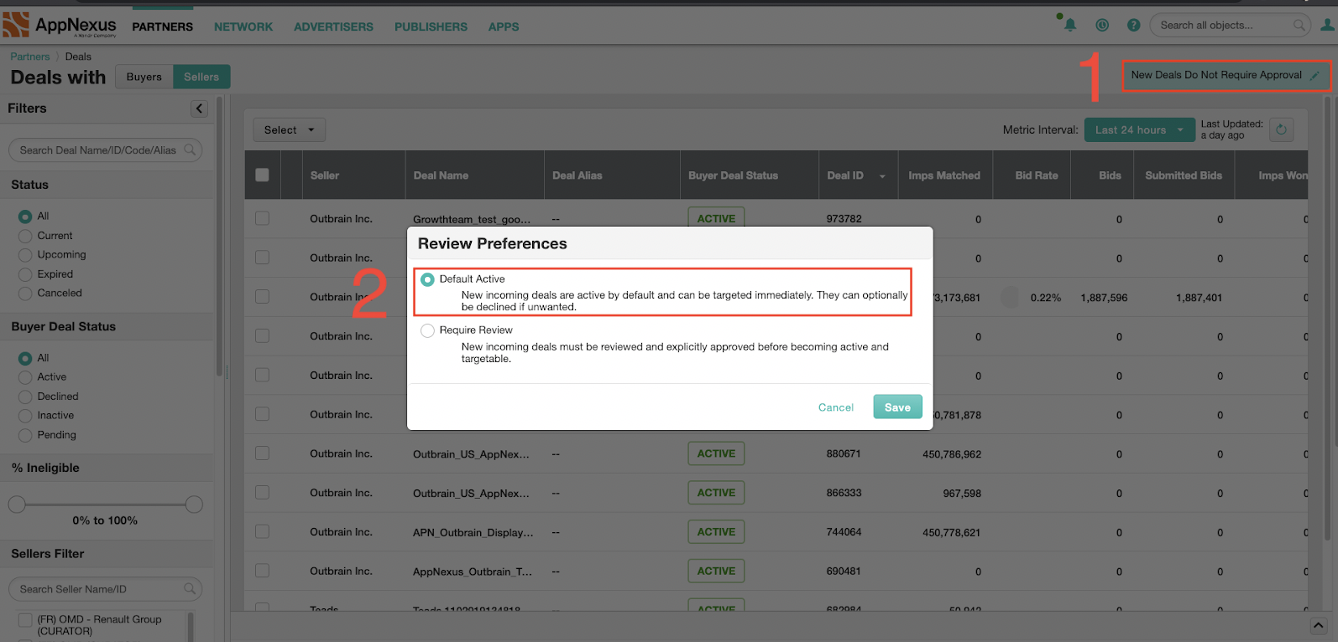
- On the buyer seat, head to Partners > Deals.

- Make sure you click on “Sellers” to access your Deals with Sellers.
- Our recommendation is to approve the deal and set the default setting to “New deals do not require approval” so that you do not need to repeat this process for every new Outbrain deal.

- Your Deal will automatically sync over to your Seller seat and be approved.
Troubleshooting
Activation and Under Delivery/Scaling Concerns?
- Run campaign ID in the Xandr Console Campaign Doctor app. To access the Campaign Doctor, follow these steps:
- Apps Tab > Marketplace > Ad Operations under “Categories” and then install/launch “Campaign Doctor”
- Check settings in Partner Center to make sure you are not blocking a specific seller, like Outbrain.
- Lack of available impressions.
- Creative size mismatch.
- Bidding below the pre-negotiated deal price agreed upon.
- Confirm the Deal type. In the line item’s “Basic Setup,” make sure the “Supply Strategy” is set to “Deals,” then select ‘Specific Deals.”
- Use the Debug Auction! A debug auction simulates a real auction without actually logging or serving anything. It then presents the results in your browser. The log shows the Impression Bug communicating with all active Bidders (including the Xandr Console) and then shows the member-specific decisioning.
- Access reporting: Select deal > My Actions > Show in Reporting.
- When creating the report, make sure that you have selected Buyers as a dimension to display all buys which are targeting the respective deal, and which are successfully winning impressions. Utilize these learnings to troubleshoot set-up.
Stumped? Reach out to your TTD or Outbrain support contact(s). We are here to help! For more information regarding Outbrain’s programmatic offering, please refer to this Help Center Article.